How to replace the Alternator on 2005 Ford Mustang
TUTORIALS
Hi everyone, it's Anastasia. In today's video, I want to show you step by step how I replaced the old alternator for a new one on my 2005 Ford Mustang.
I decided to do it for several reasons, where the first one is the battery light on my panel that constantly going on and off while I was driving. The next one is some electronic reset during the start off, where your radio is going off and the clock is going off and everything just reset it. So it's definitely a problem with electronics, and the alternator could be a reason. And then the last one is the alternator was already old enough, and it's just a time to change it.
Alright, let's get started!
Step 1: Disconnect the Battery
First of all, I disconnected the battery for safety reasons, and you want to either remove it at all or for the connector do not touch the terminals — the positive and negative. What I did is I just put a rag in between the terminals and connectors.
Step 2: Loosen the Tension Belt
The next step is to loosen the tension belt and remove it from the alternator. I didn't have a lot of instruments with me, and especially the long ply bar specifically designed to loosen the tension belt, and that's why the second step was almost the end of my journey.
But I came up with an idea that I've seen on internet and I want to share this life hack with you. So if you only have a small ratchet wrench and it won't loosen your tension belt, all you want to do is to increase the leverage. For that, I just took the combination wrench and inserted it into my wrench and pulled it up. In my case, it did make a difference and I was able to successfully loosen the tension belt.
Step 3: Remove the Bolts and Nuts
The next step is to remove all the bolts and nuts by unscrewing them. The first part of nuts was holding the cover of the alternator. I was able to use my socket wrench set manually, removing every nut.
I've seen in other videos that they have like a drill with all the bits, and using them will make the whole process much faster and more convenient to you. But I didn't have it, and thanks to all the margins I have around the alternator in my car, I was able to do it just with the manual socket wrench. It does take some time though, but you can do it!
Then I just removed the cover of the alternator and started to remove the remaining nuts holding the alternator itself. Be careful saving all the nuts and bolts you got off, cuz you're really going to need it in the next steps to put it all back on.
There was a little nut holding the positive cable, so you want to unscrew it and put the cable away.
Step 4: Remove the Connector
The last step is to remove the connector from the alternator. Basically, it's a clip, and you want to use any fine instrument that you have to push on the outer side of the clip so it clicks and you can safely remove it.
I wasn't able to show it, but I just used the flathead screwdriver and it worked just fine.
Okay, and now it's about time to get the old alternator off and put the new one in.
Step 5: Reinstall Everything Back
Basically, right now I just repeated the whole process but backwards. So you want to put all the nuts and bolts back and put everything together. If you've been keeping good count of the nuts you removed, then you're going to have everything you need to just put it back.
From what I read, the torque sequence is not really as important as on other parts of your car, so I didn't really follow any torque sequence — just by putting all the bolts and nuts back into place.
After getting the first round of nuts in, don't forget about the cover and put the cover back in.
Step 6: Put the Belt and Battery Back
Don't forget about the tension belt now. You want to put it back to the new alternator. Make sure that the belt is following the whole line cuz it's connected to the other part of your motor. I used the same life hack for increasing the leverage to put the belt back in, and it worked just fine again.
Then it's time to put the battery connector back on and make sure it's nice and tight.
Step 7: Test It!
Alright, and I just started the car to make sure everything works. I checked the battery light immediately and it did light up only on start and then went off, never coming back again. So that was really the issue, and changing the alternator really resolved it.
And that's it for today! I hope my video will be helpful in any way. If you have any questions, you can ask me in the comment section. And if you like this video, subscribe for more.
I wish you safe travels!

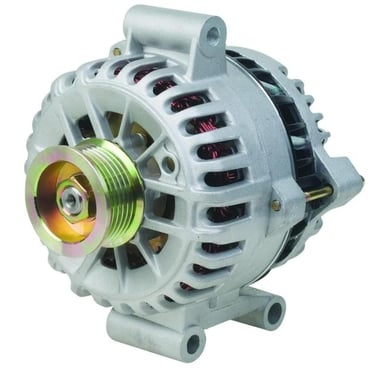
I used the alternator Compatible With Ford Mustang 2005 from OEG Parts